De-mystifying the ins and outs of laser cut curved surfaces

For the most part, laser cut objects consist of flat panels that are either cut or etched before being assembled into a final configuration. There is another way to use laser cutting to create 3D objects from flat materials, and it uses a clever design element called a Lattice or Living Hinge.
It is more common to see makers and hobbyists using Living Hinges in laser cut wood, because the properties of this material allow for a significant degree of flex before the material fractures. There are also examples of Living Hinges successfully being implemented in acrylic enclosures, which demonstrates the versatility of this technique – because without using heat to assist bending, acrylic tends to be notoriously brittle.
We’re going to take a look at two approaches to designing a living hinge – starting with the more accessible trial-and-error method, and then diving in to an overview of the mathematics behind how flat materials can become bendy.
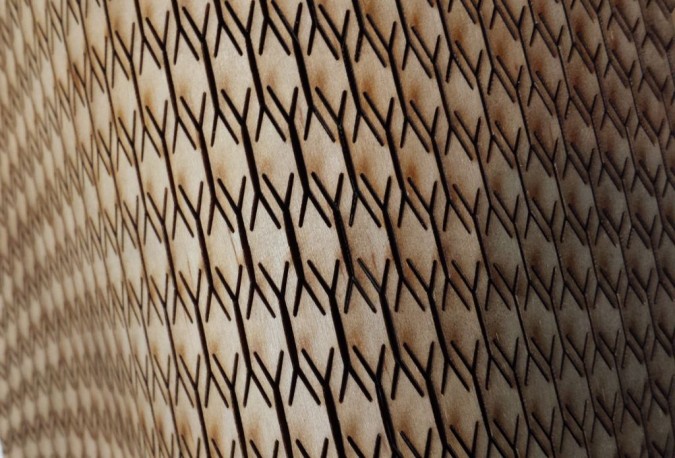
The experimental approach is a good place to start off, particularly if you have access to a laser cutter or a service like Ponoko. Living hinges work by exploiting the natural tendency for materials to flex around an array of cuts or notches. As we will see, it is possible to achieve this effect with quite a diverse visual impact; as the core concept of strategically placed cuts can still be achieved using many design variations.
In the following test cuts by Martin Breuer, different patterns were evaluated for their pliability and strength across several criteria. You can read more about his simple experiments and the conclusions he reached here.

There are a number of similar experiments documented on Instructables, with many providing sample patterns you can try out yourself. Files are available to download from Aaron Porterfield, and you can also read his reflections on the flexibility of Lattice Hinge patterns as he explores the potential to bend materials in more than one direction.

Experiments and trial-and-error are one thing, but wrapping your head around the numbers behind what’s actually physically happening to the material gives you an insight into what to expect from your outcomes. While many makers have generously dedicated time to explain the mysteries of the living hinge, the efforts of the Open Source Engineering Hub at Deferred Procrastination go further than most.
“I realised that a bit of mathematical modelling could lead to better designed hinges. This could mean fewer rounds of trial-and-error prototype tests, which would reduce the cost of using lattice hinges in a project.”
In addition to the optimisation of living hinge design for static objects, an added bonus of the mathematical approach is that it opens up the possibility for hinges to be designed for use in moving parts as well.

The key is understanding how to manage the torsional yield stress of the material, which means each of the spring connections will move enough to return to its original shape without permanent deformation.
This can be calculated quite precisely; so long as the following nomenclature doesn’t scare you away:
– Torque (Nm)
– Connected length (m)
– Torsional Modulus of the material (Pa)
– Polar Moment of Inertia for non-circular sections (m4)
– Torsional Stress (Pa)
– material thickness (m)
– number of links in series
– angle of twist (radians)
– total bend angle of the piece
Watch how the numbers are de-mystified a little in the full walkthrough on Deferred Procrastination; and if that was a walk in the park, then dive in to the more advanced tests for a deeper understanding.
Knowing how Living Hinges work can really change the way you approach designing for laser cutting. As we’ve seen here, the experimental approach can be a fun way to get real world results but it is also not too difficult to go a little further into the mathematics behind what is actually happening to the material.
Have you used Living Hinges in your designs before? Whether you prefer to crunch the numbers first or just wing it and see what comes out, let us know how you go in the comments below.
Example of DIY tests: Martin Breuer
Experiments and sample patterns: Aaron Porterfield via Instructables
How it works: Deferred Procrastination
Advanced trials: Deferred Procrastination


3 Comments
I have used living hinge before, it is a really nice technique. I use it to make laser cut lamps. Basically you cut one continuous length of wood with strategically placed hinges and then fold it into a ready lamp.
Hi 2GRAYS –
I really like this technique too – You would be surprised by how many people haven’t seen or heard about it before. When customers drop by our US Office and see the examples we have on display, they always comment on the hinges.
Do you have any photos or links to your lamps that you’d want to share?
Cheers,
Dan
I mainly used living hinge technique in 3d printing lamps, notebooks, mainly for handcrafts. My client never fails to get amazed of the design whenever they come across one.
Comments are closed.