Designing And Laser Cutting Electronics Project Boxes Just Got Easier With This Must-Have Tutorial
You’ve just made something great: It blinks, it whirrs, it speaks in tones, it’s voiced-controlled and it’s “cloud connected” (of course). And now this assembled heap of your own design is waiting on your desk for the final touch.
Whether you are making a product for sale or prototyping your brand’s next show-stopping piece of promotional swag, you probably want to not only keep this electronic creation alive for years to come but also add context and personality to your product and draw fewer eyes as you ferry it through airport security. How? By making a robust electronics project box to house and protect your hard work, of course!
The benefits of a small electronics case are clear: Your project will last longer and work more reliably, plus you will demonstrate a detailed attitude about showing off your work while enhancing the user’s experience and interaction. It’s time to think outside the box when it comes to thinking about the insides of boxes.
But where to start? Where to finish? This post will guide you through the many different kinds of materials, joinery and aesthetic options for electronics project enclosures so you can design and laser cut them like a pro.
Electronics Enclosure Design
Let’s face it. You have an image of what you want your electronics enclosure box to look like, but engineering the circuit into the final desired form is a challenge in of itself. Getting your product to function is one thing, but making it look and feel good to the user is an entirely different game.
Designing custom enclosures can run the gamut from making simple boxes to elaborate contraptions. Either way, there are many different minute details to consider. Not only must you look at the size and shape of all components, but you must also determine how they will remain in place and how the end user will access sensors and power.
Additionally, the design of project boxes not only offers visual context and cues to the user about the functionality and usability of your product, but it also conveys a specific message that sets the tone for the case. As you begin prototyping your enclosure, it’s helpful to understand these 7 graphic design elements and principles so that the design of your project enclosure is on point.
If all of this sounds like a daunting task, don’t worry. We’ve got your back. Let’s dive into the challenges encountered when creating your own electronic enclosure design and see how you can solve them.
Space And Routing
The first thing to consider when beginning any custom enclosure design is simply the size of the case. How big—or small—must it be? Start by laying out all components on a flat surface and begin compactly arranging and rearranging them until the configuration makes sense.
Then determine how much clearance can you get away with above and below the PCB to calculate exterior dimensions. Even if you’ve just got a single beefy capacitor sticking out of the board, it’s imperative to make any adjustments to the effective volume of the project box now while the design is still flexible.

Another consideration: If you have panel mounted switches or lights, think about not only how to arrange them on the walls of your case but also how to keep cable lengths to a minimum by adjusting the position of remaining components.
Internal Mounting
While the electrons in your circuit are eager to find that lovely path of least resistance, you probably want them to take a certain route and keep all components from shorting or loosely jumbling about in the enclosure. Thus, any exposed wires or connections that could cause a short should be insulated, and every component will need to somehow be secured in its spot to withstand any motion when fully housed. For products that will be sold or used as promotional giveaways, you’ll want to ensure everything is mounted securely in order to endure the wear and tear from the user.
For PCBs and other flat components, the most practical means of fastening to the case is often screwing them into the enclosure. (Many pre-made cases will have grooves molded along the walls to allow a board to easily slide in and out.) You can also add standoffs or threaded inserts for a secure point of contact.
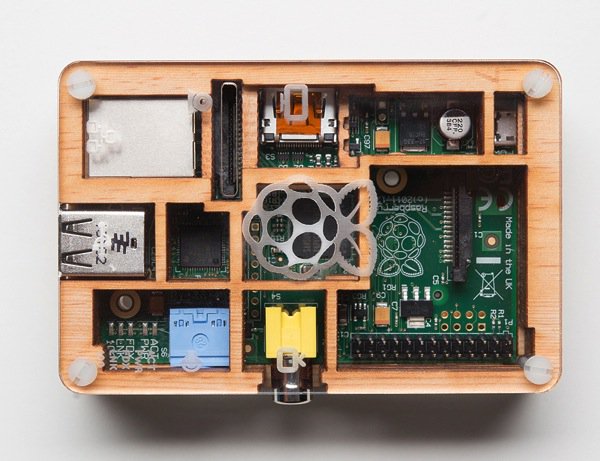
The layout of internal parts are well illustrated in this case by Adafruit. The components of this board are actually incorporated into the design and celebrated, rather than hidden away in a box.
Consider if your case must stand up to constant vibrations (as a new widget in a car, for instance). You may need to add a locking nuts, o-rings or other special washers, so as to preload your screws and keep them from wiggling free. If you don’t want to bother with screws, then most any component or board can be mounted with a generous helping of hot melt glue or a dab of epoxy.
Accessibility
Most anything can be assembled once. But how often will components need to be replaced? Is the device battery operated? Is the battery rechargeable? Is it powered by a USB cable? It’s super important to take into account how likely the enclosure parts must be accessed and how they’ll be reached. Nothing says fun like trying to reattach a loose ribbon cable with tweezers because the design was made permanently close or simply too small for anyone’s hands.
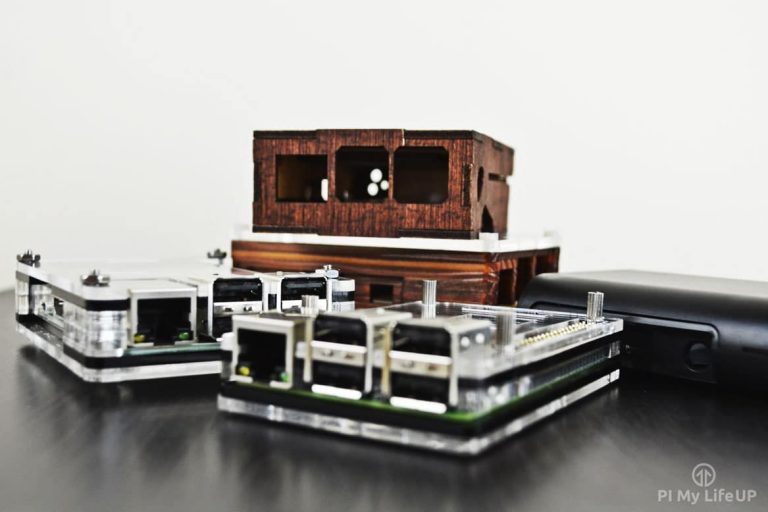
One technique is to internally stack PCBs and components like this example via Adafruit.
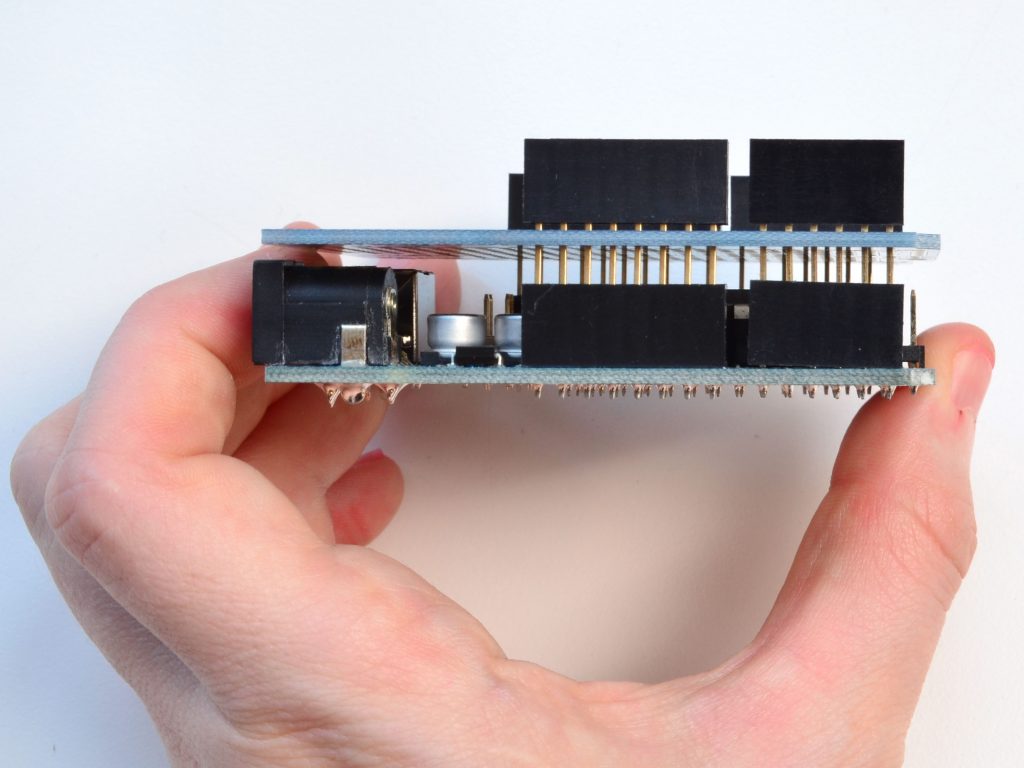
Because there are fewer points of contact between the parts and the enclosure, this allows the stack to be taken out as a whole assembly. You can also try to mount all electronics to one surface or an internal plate. If there are a lot of panel mount electronics, take the extra time to crimp or solder on quick connect terminals so you can cleanly detach the main PCB alone.
Enclosure Design Software
For just about any laser cut case, you’ll want to create the design using a vector graphics editor. You can survive designing many a project using just Adobe Illustrator and the pen tool. And almost any free vector creation tool, such as Inkscape, will also do.
The biggest challenge will be learning how to translate a sheet of two dimensional designs into 3D structures. But once you’ve made a box or two, you’ll find the flow of this design process to be pretty easy. If you want to skip any fancy design software, you could also make an interlocking box pattern with just a few keystrokes for a simple laser cut enclosure.
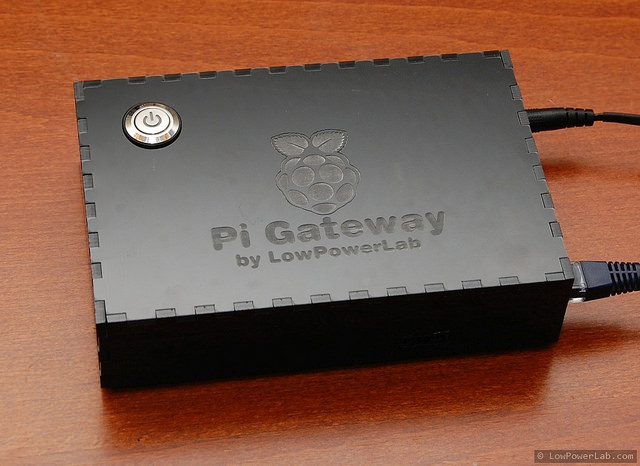
If you want to make a box like the one pictured below, this tutorial will show you how to make a slick custom enclosure step-by-step.
For designs that require more intricate details or if you would like to have something CNC milled, use 3D CAD software to create a solid model of the enclosure (as well as the parts inside). If the whole 3D modeling thing is brand new to you, check out TinkerCad, a free open-source online modeling software that is beyond easy to learn. (Trust us: If we can figure it out, so can you.)
For the more programmatically minded, OpenSCAD is a great free solution, if a bit tedious. But if you need the sweet embrace of a GUI, then Autodesk’s Fusion 360 is a very powerful CAD package that is free for most regular users.
Prototype Prototype Prototype
If your design includes an I/O panel, print it out on a sheet of paper at 1:1 scale and break out the calipers. Not only will you be able to confirm dimensions, but also having a physical sense of the design is important while you can make changes virtually and at little cost.
If making a handheld project, cut a rough analog out of wood or stack sheets of cardboard (my personal favorite) to match the size of your piece. Is it comfortable to hold? Can you reach all of the buttons easily? A little UX goes a long way.
Choosing The Right Material For Your Electronics Project Box
So now you’ve got a great design, one that fits your needs and, more importantly, keeps all of your hardware components and dangly wire bits fitting snugly inside. But at this stage, it’s probably just a drawing on a screen. You’ll need to take your digital design (or napkin sketch, we won’t judge) and make it out of something solid and sensible for its future environment and ultimate end user.
Choosing the right material is more than aesthetic. Those who are making a product for sale will need to ensure a high-quality enclosure to tolerate a customer’s use, while those making branded merch must have designs that align with their brand’s DNA while keeping costs down.
Additionally, you must assess how the electronics enclosure will be used and by whom. Will it live outside in a temperate jungle? Does the device need to handle being touched by thousands of interactive guests in the desert or survive a damp night on stage with just a foot smashing it about? Are you selling it online and need to make sure the product will last a long time without repairs? Are you handing out hundreds of this device at a convention to promote your brand?
Material choices greatly impact the longevity and feasibility of your project, so choose wisely! Let’s look at the most common material choices and their ups and downs when it comes to cost, quality, and ease of modification and assembly so you can make the best decisions.
Metal Electronics Enclosures
Nothing says “this is a finished product worthy of respect” more than a custom metal case. Having a metal electronics enclosure is often the most expensive housing solution, but it yields the most benefits when it comes to reliability.

One of the most practical advantages that metal enclosures afford, due to their conductive nature, is quality RF shielding. This is especially important for keeping that stray EM radiation at bay (or keeping your own RF pixies in place). Also, a single threaded hole makes for a solid ground connection to the rest of your circuit, which is especially important if you have electronics connected to electronics connected to the grid via wall power.
In terms of aesthetics and practicality, metal is a great option for those who are making a for-sale product, but it’s typically not used in promotional situations such as trade-show giveaways due to cost. However, metal enclosures would make sweet branded VIP gifts for those who want to use their budget on a limited run with a big impact.
That said, using premium materials such as metals are an important consideration for brands that are associated with high-quality products and are looking for ways to created branded merchandise beyond mass-giveaway items. Think about how Apple uses routed metal casings rather than plastic for laptops, which elevates the perceived value of the product in the market. In these instances, it makes sense to use premium materials to stay aligned with brand image.
So what metal material choices are available? While there are more metallurgical differences between alloys that are beyond the scope of this article (however, diving down that rabbit-hole is worth the time), here are a few solid options:
Steel
Strong, heavy and readily available, steel has an amazing cost/benefit ratio that’s hard to beat. If you like playing with fire and high-current electronics, welding a good ol’ steel box will yield a nearly unbreakable enclosure, even if it does weigh 10 pounds. And unless you find yourself in the Atacama, you’ll definitely need to protect your steel from oxidation with a proper finish. A powder coat, which will add a solid, glossy finish in nearly any color of your choice, is worth a little dimensional thickening.
Stainless Steel
If you’re willing to spring a little extra cash for your enclosure, stainless steel could also fit the bill, especially if you prefer something non-magnetic and capable of withstanding harsh, moist environments.
Aluminum
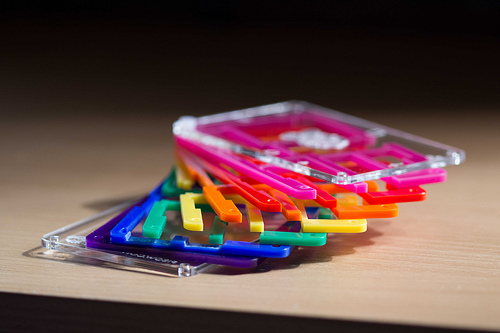
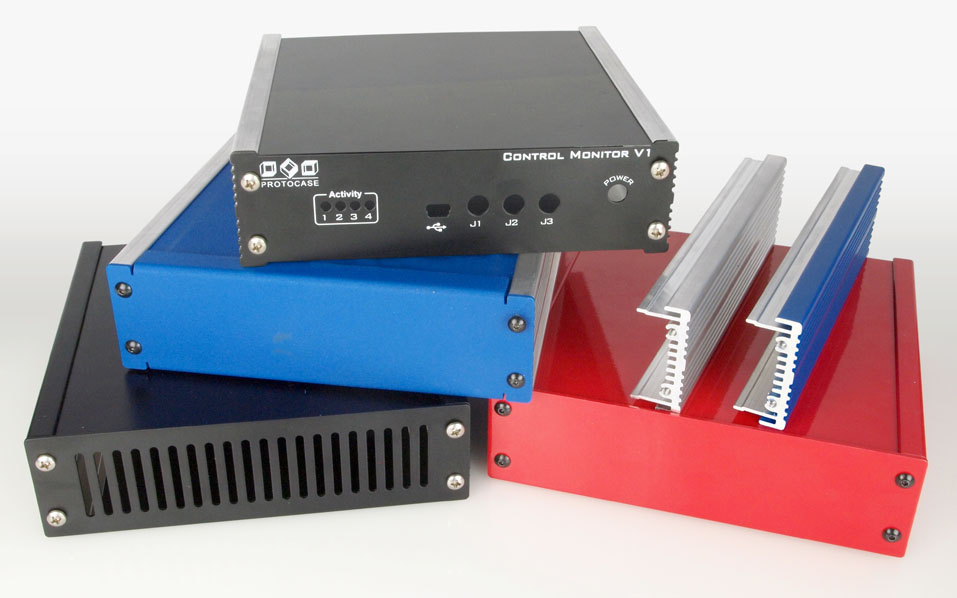
Softer, cheaper and more easily machinable, aluminium makes for a terrific electronics case. Aluminum can be anodized, which not only provides a protective finish but also allows for colorful dyeing to add a customized, professional look. Anodization can be selectively laser engraved away to provide a dimensionless label or artistic flare for your enclosure. To see just how creatively aluminum can be cut, bent and finished into something beautiful, take a peek at the colorful cases offered by Protocase.
Brass
A generally soft yet heavy alloy, brass enclosures can be soldered, brazed or bent together with relative ease. Whether you have a steampunk heart or not, it’s hard to deny the attractiveness of this classy metal. Although it will cost you (even in small quantities), you can’t go wrong with the shimmering, golden look of brass as your enclosure material.
Wood Project Boxes
For a simpler (and far less expensive) alternative to metal, a wood project box can be the way to go—especially for branded merchandise because it is low cost and easy to source. Whether you choose to laser cut a wooden case or DIY one yourself with a few simple tools such as a drill press and a saw, you can make a wood electronics box that will last for years to come.
Not only is wood a decent insulator (as far as most low-voltage projects are concerned), but it arguably has the most finishing options of any material. From painting, staining and oiling to clear-coat sealing or waxing, you’ll be able to create just the right look for your wood enclosure.
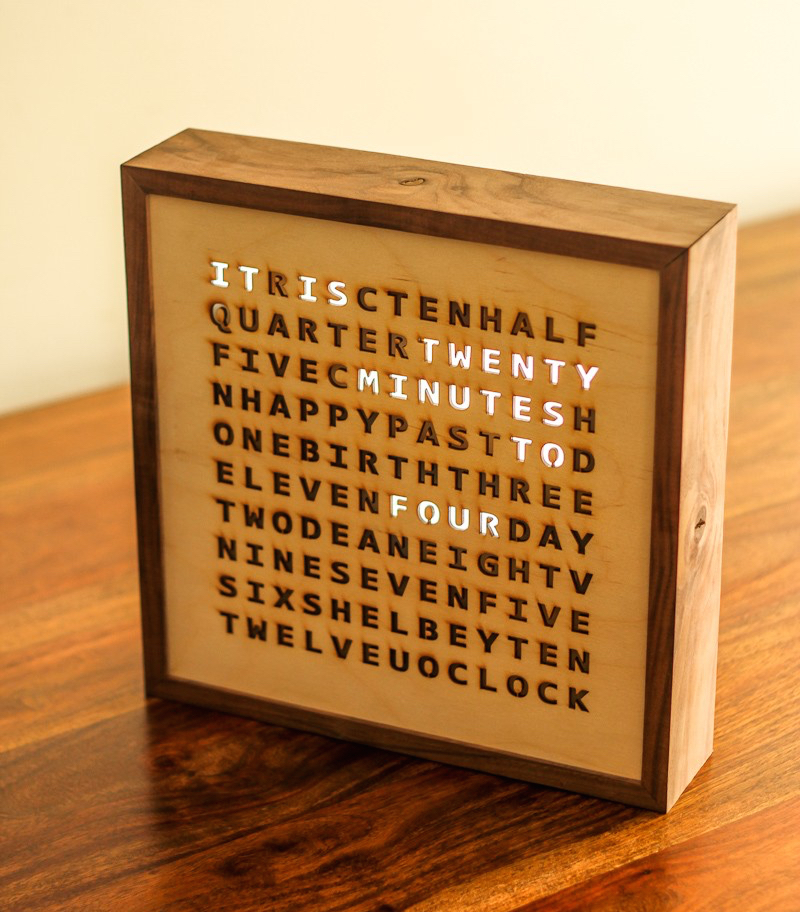
This birch plywood laser cut word clock is run by two separate Arduino microcontrollers and a DS3231 RTC. Apart from telling the time, it is programed to show rainbow colored birthday messages. What a way to celebrate! Read all about the project over on imgur
The simplicity of working with wood makes it an attractive material choice. Just take a look at this 2×4 enclosure. Scrap wood has never looked so cool.

Plastic Enclosures
Compared to metal and wood, plastic forms a nice middle ground in terms of cost versus durability. Plastics can offer a pop of color and give a high quality feel to your product without breaking the bank. The color can help align a branded product to the company’s image or make a for-sale product look more playful and modern.
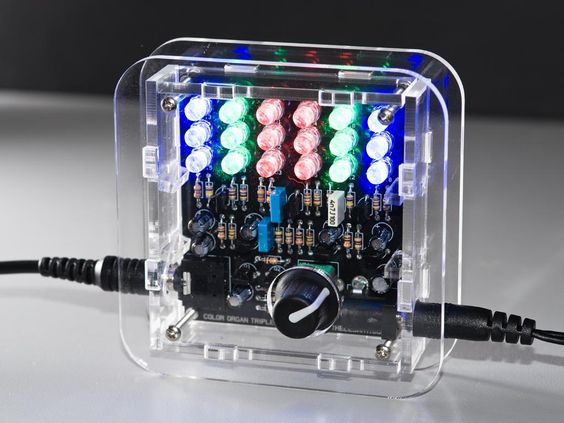
While plastic color selection is amazing, sometimes you need a case that doesn’t draw attention and lets the electronics’ colors shine through, as in this color organ clear acrylic case. Let’s take a look at a few popular kinds of plastics used for electronics enclosures.
Acrylic
Acrylic is a great material to work with because it is so versatile. It can be easily laser engraved as well as heat bent to create curves or bonded to itself with solvent welding. When working with acrylic, keep in mind that this material can build up a static charge. Thus you may want to treat your own case to prevent wary discharges through your sensitive electronics or use an anti-static acrylic.
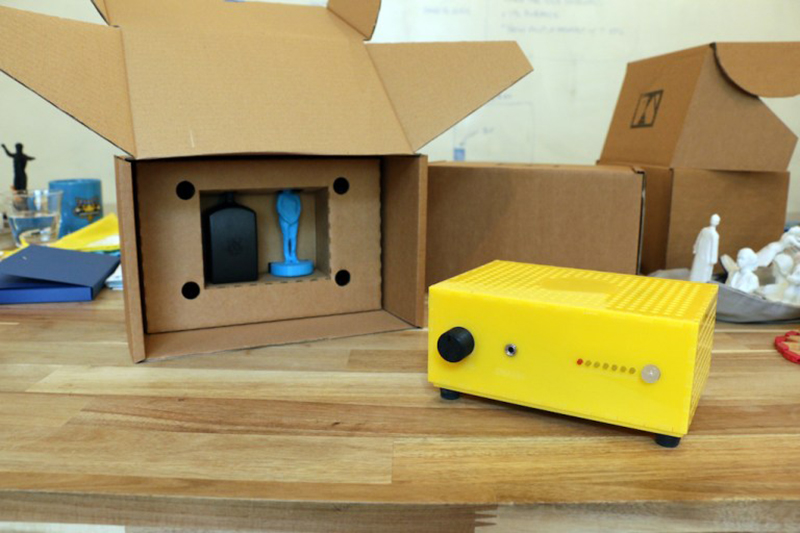
Acrylic seems to be the go-to among DIYers looking to make plastic enclosures for electronics projects, such as this bright yellow museum box.
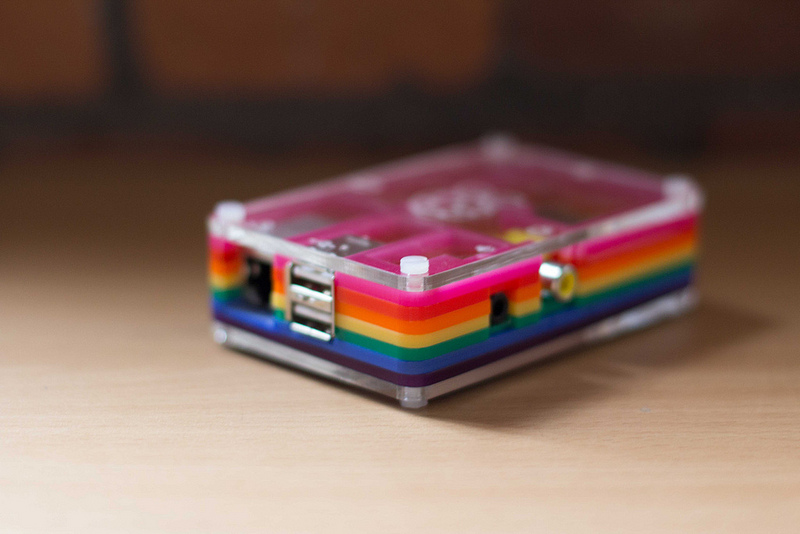
Although it is naturally quite brittle, acrylic is an easy choice if you seek colorful cases that can showcase your internals (the PiBow comes to mind). There’s just something special about a neon translucent acrylic box stuffed full of wires and LEDs that’s just so damned cool.
ABS
Acrylonitrile Butadiene Styrene (ABS) is a tough thermoplastic that also makes for a great enclosure. The stuff of LEGO, ABS isn’t prone to shattering like acrylic, and it can be welded together with common acetone for permanent, air-tight seals that make for a durable plastic enclosure. It is often found in 3D printed prototypes and products. You’ll often encounter premade box enclosures like these made out of molded ABS in nearly any shape you could want.
Acetal
If you want to make a case that can take way more of a beating than a mere acrylic box and are perfectly fine with limited color choices and a less shiny finish, then acetal (often found under the brand Delrin) can do the job. To learn more about this magical polymer, Joshua Vasquez wrote a fantastic multi-part series on how to build anything using Delrin and a laser cutter over on Hackaday.
When it comes to materials for your design, there are no monolithic rules. You’re far from limited to the few kinds of enclosures discussed above, so check out this myriad selection of laser cutting materials to see just how many options are available for your design.
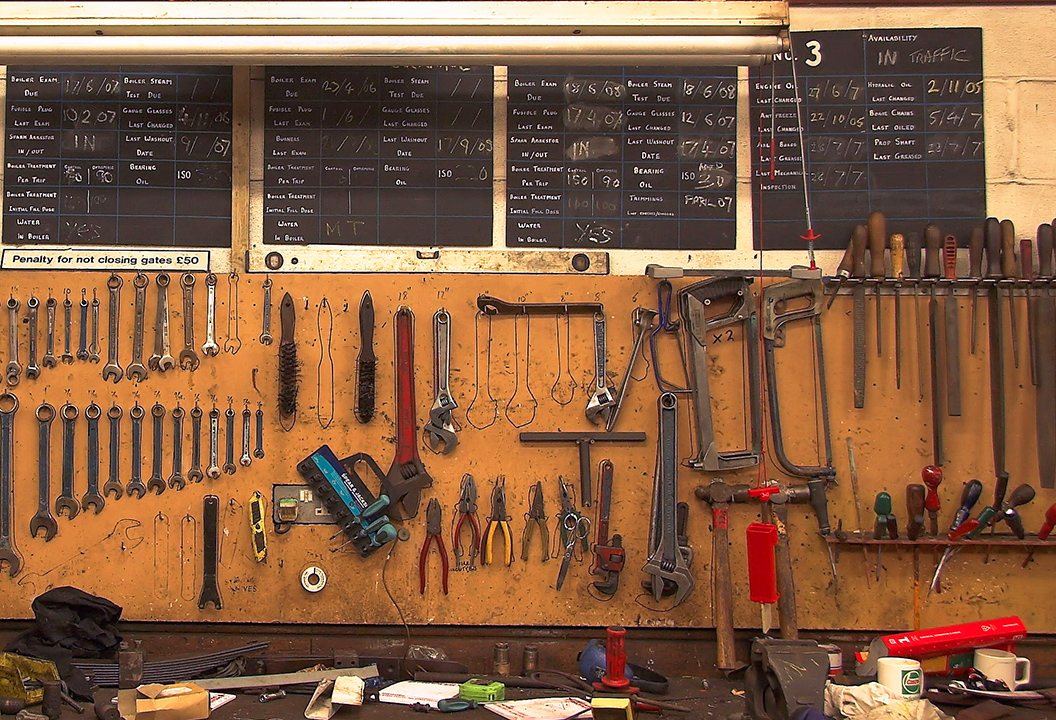
Making A Custom Electronics Project Box
Let’s make something ourselves! (Well, you make something. We’ll just stay here, disembodied, barking words of encouragement.) If you want to make a case from scratch, this tutorial over on Instructables walks you through all the steps—from creating the template and rough cuts to dealing with connectors, electronics, mountings, wiring and testing the finished product. And these basic tools will help get you started for nearly any enclosure build:
Drill – Pick up a good set of bits! You’ll find nearly any electronics project box needs a lot of holes for all those darned LEDs and switches, not to mention the many spots for mounting screws.
Saw – You’ll want something to cut down raw stock for your case. Something that moves on its own is preferred, but patience and a good handsaw have done just fine for centuries.
Rotary Tool – Use it to make quick work of rough holes and carve out square corners. Be sure to grab extra sanding drums and cut-off wheels.
Files – Take those final light passes to any hole or square edge to get a precise fit that only good old fashioned handwork can provide.
Calipers – Keep measuring your parts and mark your dimensions before you make a permanent cutting decision.
By combining the power of these tools, you’ll be able to take just about any heap of scrap material and make a dashing custom electronics box.
But what if you don’t want to do quite that much hand (or hard!) work? Then let the machines do the heavy lifting. Digital fabrication tools such as the 3D printer, laser cutter and CNC machine allow independent makers like yourself to create professional quality products or branded swag without the crazy overhead of large-scale production facilities.
So do you still need the tools mentioned above if you plan to laser cut or 3D print your enclosure? While these tools are obviously suited for handmade enclosures, they still come in handy when machining parts. The funny thing about digital fabrication is that no matter how precise your design files are, they still usually require some attention from the hand of the maker, i.e. YOU! Having a full set of tools will help you make the small adjustments and finishing touches needed to make your laser cut or 3D printed parts perfect.
Cases For Single Board Computers And Microcontrollers
If you’ve plunged into the exciting DIY world of embedded computing, you’ll want to have a single board computer case that keeps your project safe and sound. Depending on the board, there are a few different things to keep in mind:
Arduino Case
The Uno layout, which also works for the bigger Mega, Due and similar variants, allows for the boards to be screwed in with M3 or 4-40 screws at several points of contact.
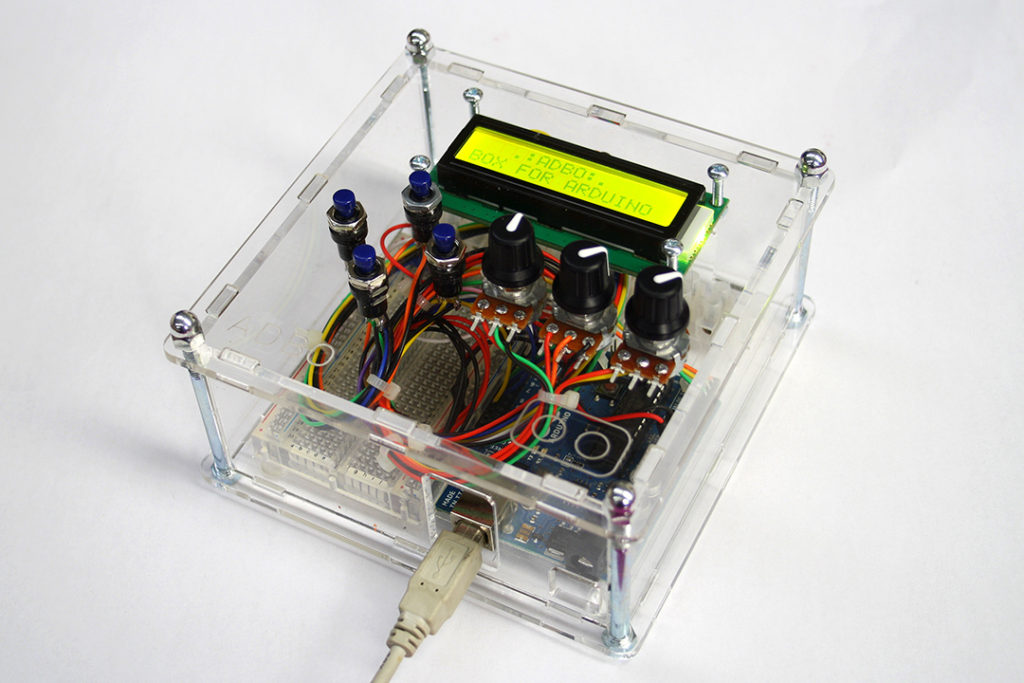
After many iterations, the folks over at Oomlaut created this laser cut ADBO – Project Box for Arduino. What’s cool is that the construction requires just more than an A4 (letter) sheet worth of acrylic and four nuts and bolts to assemble. Easy peasy. Get all the details via Flickr.
However you design an Arduino case, you’ll want to be sure to leave holes for the USB port, top mounted pin headers and ICSP port (especially if you may have fried the USB-serial converter chip). A regular Altoids tin fits the classic Uno dimensions quite well if you want a no-frills enclosure, but take care to insulate the bottom of the board from the metal base! This tutorial will show you how.
Arduino Pro Mini/Pro Micro Case
The size of your microcontroller will always determine the size of your enclosure, so those hoping to make a small electronics product will probably be using an itty bitty board such the Arduino Pro Micro like maker bitxbit did when building thier Arduino VU meter oled.
At only 1.3” x .7”, the Pro Micro allows you to reduce the enclosure size without compromising functionality. Make sure to pay attention to the USB port; Keeping it accessible will make powering the product significantly easier.
Raspberry Pi Case
The world’s favorite single board computer, the Raspberry Pi (a.k.a. RasPi) deserves a respectable case of its own. Check out five of the coolest Raspberry Pi cases, including this wooden borg case, here.
When making an official case for Raspberry Pi, there are a few things to consider:
Raspberry Pi Model A & B
The OG boards have two solid mounting holes, a smaller pin header, and bulky audio and video connections towards the rear of the board that make them incompatible with any cases or enclosure designs you’ll likely find today.
Raspberry Pi B+
Starting with the B+ model, the foundation simplified future case design by not only adding two more mounting holes and arranging them in a rectangular pattern but also combining and moving the audio/video connector to match with the power and HDMI port side. So a B+ case is Raspberry Pi 2 case is a Raspberry Pi 3 case and so on. The model “A” variants are truncated toward the USB side, but they maintain the same mounting points and port locations as the model “B.” You can find some snazzy example RasPi case designs in these Nwazet enclosures.
Raspberry Pi Zero
The original “$5” computer shares the same 40 pin (yet unpopulated) connector as its mainstream model, and it has four mounting holes for secure fastening. This board has quickly seen a few revisions to the 1.3 “W,” which includes a miniature CSI port as well as wireless connectivity built-in, so be sure to add a slit for the wee camera cable, too.
Netduino Case
There’s more than one duino on the block and the Netduino has a nearly identical mounting layout as a standard Arduino Uno. Bear in mind that in lieu of the ICSP headers, you’ll find connection points for JTAG, which will require a slight modification to any enclosure’s top plate.
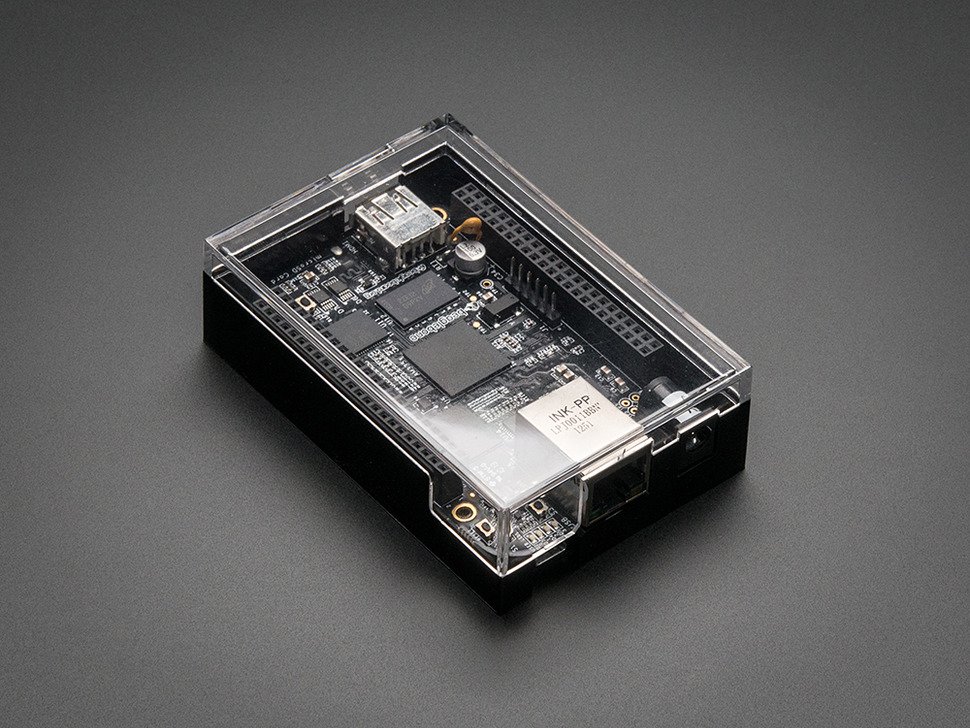
Beaglebone Black Case
A Beaglebone Black case has similar requirements to the Raspberry Pi. You’ll want to keep a easy access port for the micro SD card, a port to the power and USB socket, and holes for the two major pin headers for unfettered GPIO access in your BBB case. Check out this slick style via Adafruit for inspo.
Udoo Case
At 11cm x 8.5 cm, the Udoo Case is an ARM Linux board that needs a bit more space than the rest. But most of the necessary ports are aligned to one side, and it also has a bevy of mounting holes for securely fastening it to any enclosure.
Micro:bit
Those who are attempting their first DIY electronics project and enclosure might want to work with the Micro:bit. It’s a great board for beginners due to the amazingly easy to learn programming interface. Plus it’s also nice and compact. At 43mm x 52mm, the Micro:bit is about half the size of a credit card.
The Micro:bit comes with a whole slew of connected hardware, such as a small LED matrix, several buttons and sensors, and a solderable pinout bar along the bottom. Some Micro:bit enclosures even allow access to all the hardware included on the board. As you design the enclosure for this board, consider the parts already included on the board that need to be accessed by the user.
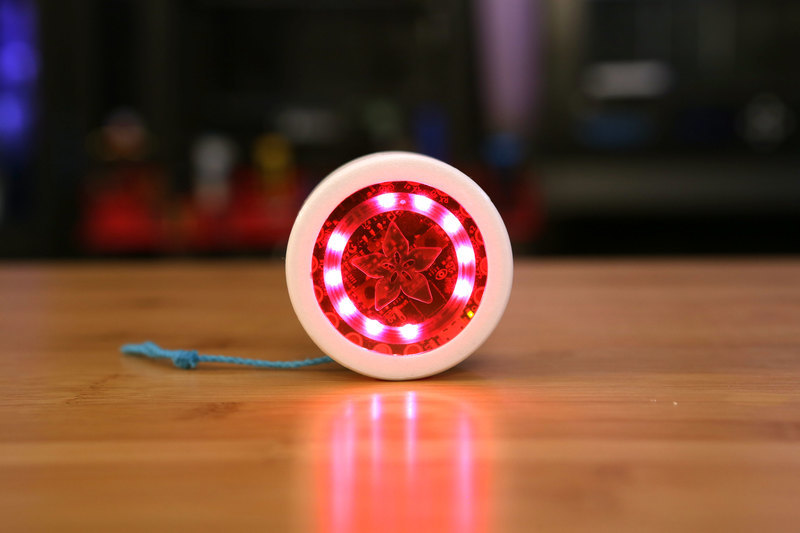
Adafruit Circuit Playground
Building an enclosure for Adafruit’s Circuit Playground requires some extra considerations not only because of all the sensors and actuators included on the board that might be used, but also because this board is round. The unique shape of the Circuit Playground might suit your final enclosure idea, if it’s something super fun like this Yo-Yo by Adafruit.
Particle Photon
If you made an IoT product and are interfacing with IFTTT, then you might be working with the Particle Photon. This compact board is only .8” x 1.44” and comes with or without the header pins soldered on, whose presence—or lack thereof—will affect the shape and size of the enclosure. The Particle Photon also comes equipped with a USB port, access to which should be considered when designing the enclosure.
Custom Electronics Enclosures
The world is full of plenty of like-minded creatives who’ve made their own custom electronics enclosures, so let’s take a gander at what they’ve shared for some inspiration:
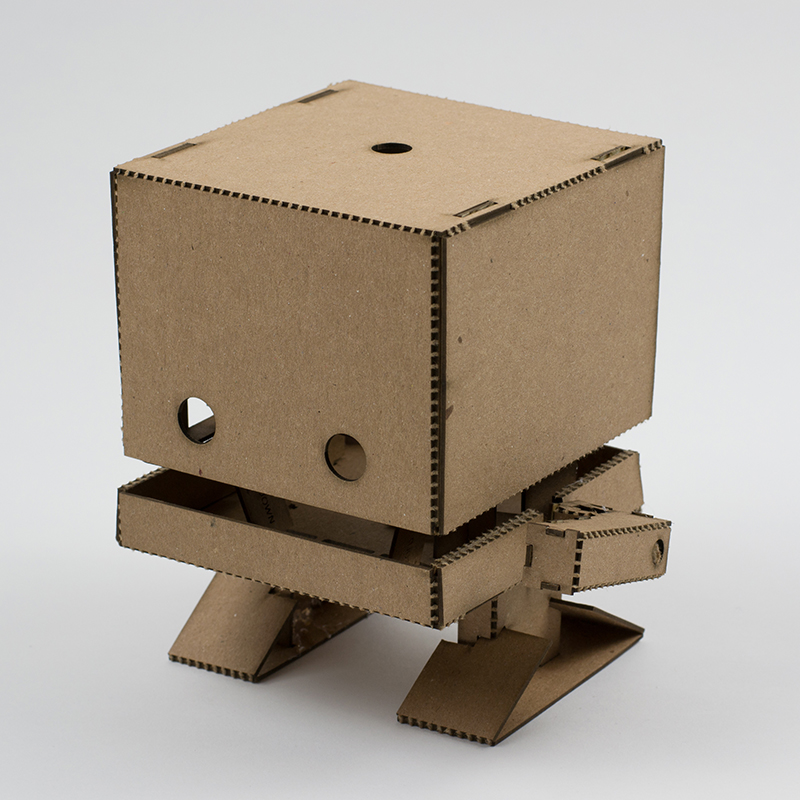
Meet the Sumo Robot, a promotional electronics product in a laser cut enclosure made by Microsoft for the Build Developer Conference. The goal of this promotional giveaway was to encourage the community to try Windows 10 on Raspberry Pi. So instead of slapping a Microsoft logo onto catalog products such as mugs or tees, Microsoft decided to giveaway something truly engaging and interactive.
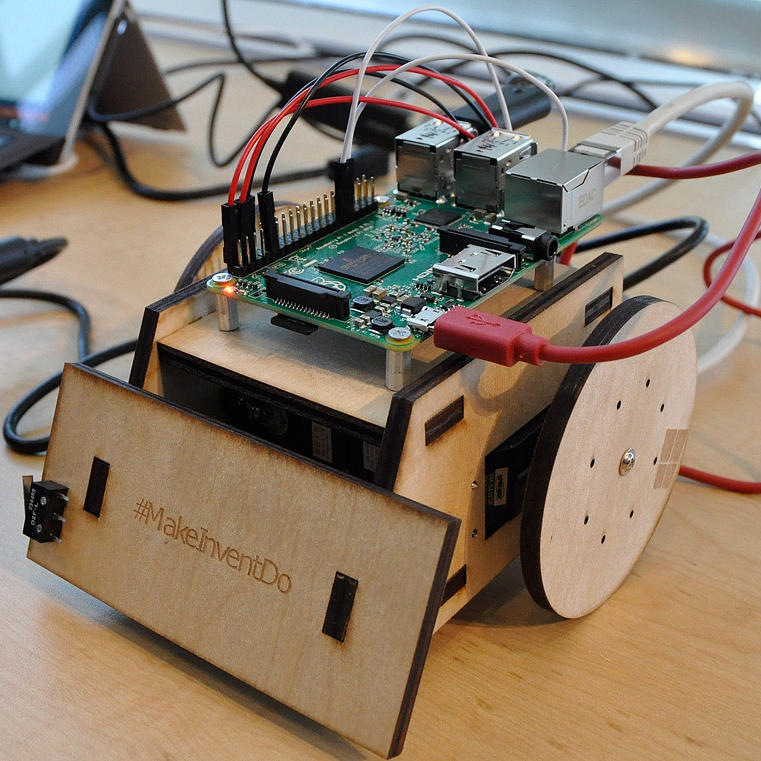
Microsoft faced a massive challenge in keeping the cost down for these cute little robot babies because they needed to develop PLENTY of them to hand out to attendees. Notice the clever use of laser cut wood, as opposed to a plastic. The choice in materials in conjunction with the inexpensive production technique allowed the promotional team at Microsoft to develop 500 robot kits at low cost that were a huge hit with the crowd. Read all about how the promo worked here.
Another adorable robot in a laser cut enclosure is the TJBot by IBM. We love the way the design creates some personality for the robot and clearly expresses to a new user that this is indeed a robot.
The purpose of this open source product is to help users learn to interface with IBM Watson. By making a cute enclosure, IBM has indicated to the user that they can be playful with this product. The TJBot is sold as a kit, but IBM also offers the design files online for you to make yourself.
What’s it like to make and build a custom enclosure? For an insider’s view, follow along with maker Marc De Vinck as he takes this CupCake CNC from unboxing all the way to the first test cut via Make:.

Case Closed
So that’s the basics when it comes to making a case for your electronics. Hopefully you’ve found some solid inspiration and gained more practical insight into creative and robust enclosure design. Now get out there and make something!
Additional thanks to Melissa Felderman for providing supplementary content and Lisa Horn for writing and content editing.